Supplies
Mason Jars
Mason jars are considered the perfect vessel for fermentation. Any size will work!
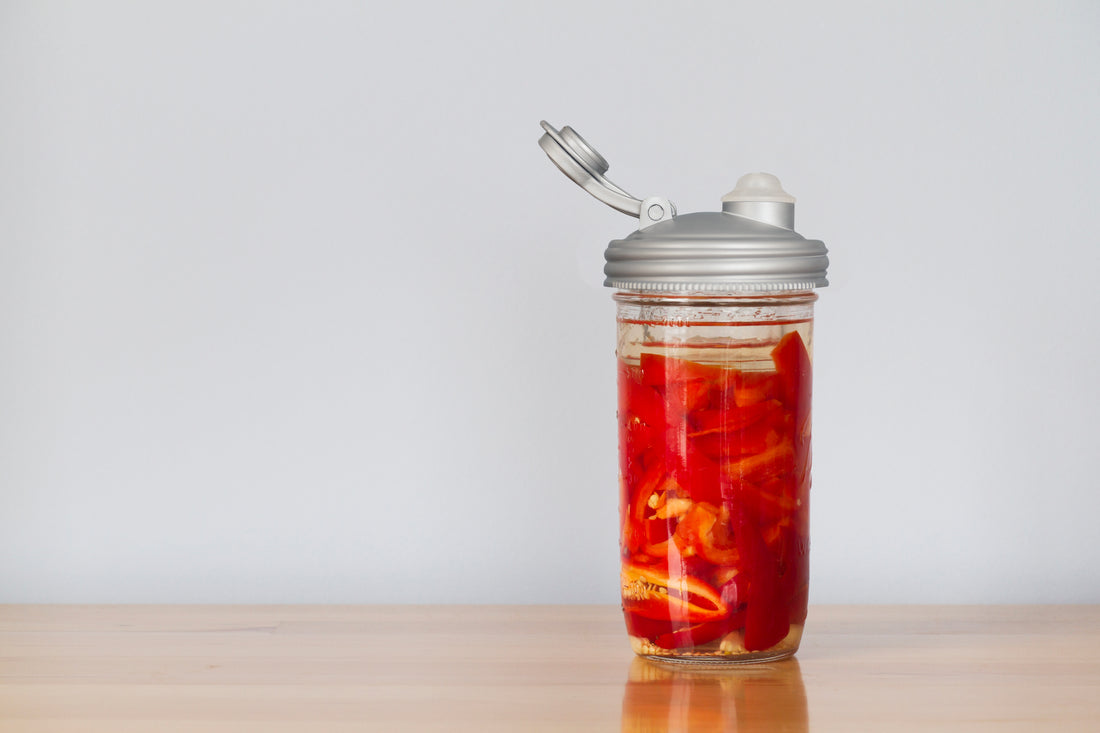
reCAP® POUR
reCAP Mason Jars converts the already popular POUR cap into a fermenting tool and makes storing easy once the ferment is complete.
reCAP® Fermenter
The reCAP Fermenter is a simple, durable, waterless airlock that fits into any reCAP
POUR cap and requires no maintenance.
or
reCAP® Ferment Kit
Weight
We recommend 4 ounce Jelly Jars as weights but there are many options to keep your vegetables submerged. Check out our hacks for ideas.
Fresh Produce
Choose your favorite produce and experiment with any raw vegetable.
Salt
Any salt will work but it’s better to use unrefined salt such as Himalayan Pink Salt or Redmond Real Salt.
Water
We recommend filtered tap or distilled water when fermenting to reduce the risk of unwanted chemicals or contamination in your ferment.
Fermentation How To/Tips
1. Wash everything really well. This includes all equipment and vegetables. The process of fermenting is to remove oxygen and allow good bacteria to grow. Clean hands, jars, tools, surfaces and food are an important first step.
2. Chop & pack tight. Chopping fine or shredding vegetables provides more surface area and ferments quicker than larger or whole pieces. Press down and pack really tight into the jar to eliminate pockets of air.
3. Salt & submerge. A good rule of thumb for making brine is 3 tablespoons of salt per quart of water. Or for dry salting (rubbing the salt directly onto the produce) 1 tablespoon for every 11/2 pounds of vegetables, as demonstrated in the Kimchi and Salsa recipes. Use unrefined salt such as Himalayan Pink Salt or Redmond Real Salt. You must keep the vegetables submerged under water. If the vegetables float to the top and remain exposed to air, they are likely to develop mold. You can use a cabbage leaf, small glass jar, lid, or saucer. Some people use special fermenting weights. Or just put whole or large pieces of vegetables on top to keep everything weighted down. If some vegetables float up and begin to discolor just remove them.
4. Keep the air out but yes, you can peek! Cover the jar with a reCAP POUR and put the airlock in the spout. This will keep the air out but allow the natural fermenting gases to escape. But just like cooking, you don’t put a pan of food
on a burner and just come back when you think it’s done (at least not on purpose). Same thing with fermenting, open up the jar and smell it. Take a piece and eat it. Once you achieve the taste you like, take the airlock off, put the pour lid down and put the jar in the refrigerator. The process will take 1-4 weeks to ferment. Once refrigerated, it will last several months.
5. How do you know when it’s done? It’s all a matter of taste. More salt will keep the produce crispier and will slow the fermentation process. Less salt makes
the vegetables softer and will speed it up. Also, the temperature plays a part. Ideal temperature is 65-72°F (18-22°C), in warmer temperatures the ferment is quicker, but if it’s cool, slower. I did a ferment without salt and it was done in 3
days! I did another in a brine of 5 tablespoons of salt per quart and it took 3 weeks.
6. How do you know if something is wrong? Signs that something is wrong: slimy texture, pink hue, browned or dried out vegetables, funky odor, or mold. If it’s bad, then pitch it!
Other Blogs You May Like...
Brew your own Kombucha
Apple, Ginger, and Orange Sauerkraut Ferment
Citrus Infused Cleaning Vinegar